Practicality? Ten.

Brad made and installed our two new rain barrels yesterday--just in time for them to get tested! I've been wanting them for awhile because-well, because rain water is better for the garden AND rain water is FREE. Ok, and well because I just think they're cool.
After looking on Craigslist for local sources of food grade 55 gallon barrels (ahem--at $30 or more EACH!), Brad purchased two from an apple juice company up near his parents' cottage. They smelled like apples!! Once they made it home and sat in the sun for a week they smelled like nasty apples, but whatever. The cost for these barrels was $20 and really no cost for gas or travel time because Brad & the boys were already up at his parent's cottage. Sa-weet!
We looked at rain barrel set up online. There are a couple of options for rain barrels: one is to use a closed top and feed the gutter straight into a hole. The other option is to have an open top that is covered with screening and have the gutter just lay on top. We choose #2, mostly so we'd have an intact lid to place back on the barrels when we disconnect them for winter. Using a few simple parts purchased from Lowe's, and drilling holes and popping everything together, the project of building 2 rainbarrels + installation took less than 1 hour. Total cost for parts was $9 for each barrel-$7 for the spigot and $2 for the overflow valve/parts. We had screening here, so that was zero.
All told, we spent $58 for two complete rain barrels. Here's a basic checklist of what you'll need from the store:
1 55 gallon FOOD GRADE barrel. MUST be food grade.
1" PVC a few feet long
1" PVC elbow
1 threaded faucet spigot + plumbers tape
Drill
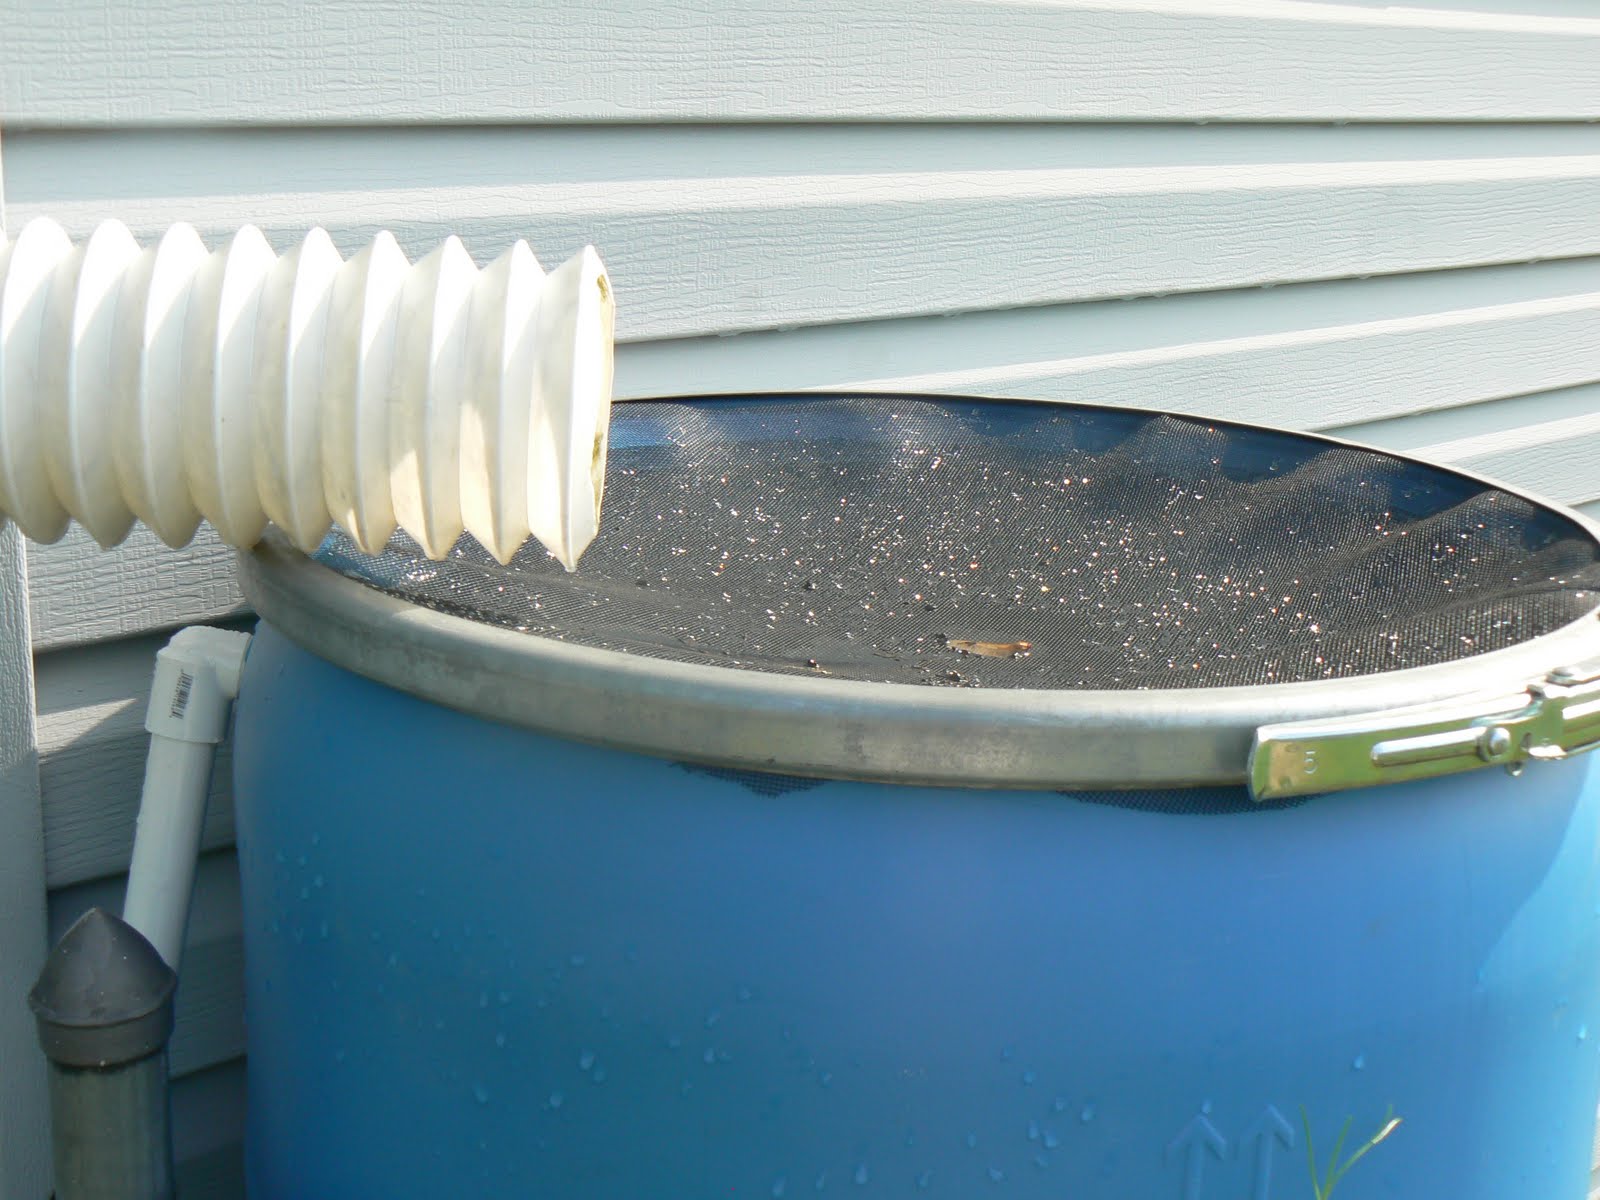
For the barrel shown below, we basically cut the gutter/downspout and used an accordian elbow attachment we had on hand to direct the water into the barrel. We opted for 2 layers of standard window screen on the top of the barrel, using the ring that that came with the barrel like an embroidery hoop. You must cover the barrel opening in some fashion.
We have the barrel propped up on a few cinder blocks. You want it as high up as you can safely raise it to allow gravity to help feed the water out faster.
Use the drill to drill out a hole up near the top. Put a short piece of PVC in the hole, attach the elbow and the remainder of the PVC. This is the overflow valve.
Use the drill to drill out a hole for the faucet/spigot, down near the bottom. Wrap the threads of the spigot with the plumber's tape & screw it in. That's basically it.
 |
| Front rain barrel. The perennial sweet pea vine will (hopefully) hide it from street view. |
 |
| Top of front rain barrel. You can the see the white PVC overflow valve. It just dumps directly down into the flowerbeds below it. We may lengthen that pipe a little to better direct it. |
Next was location. They need to be on the south side of the house as that's the side that has the most gardens and the north side of the house needs some relandscaping. (*cough cough* That's a different post altogether!). Brad built a platform for them to stand on out of items we had on hand-so the platform cost was zero.
 |
| Front rain barrel--platform is concrete blocks and a few pieces of scrap lumber. The hollyhocks will fill in around it and it'll be more hidden. |
 |
| Back rain barrel. Again, a platform of concrete block and wood. The overflow valve on this one vents directly into the gutter downspout and then empties out in front of that flower bed. Pretty ingenious! |
 |
| Closer up view of the rear rain barrel. It's a little crazy right there, the "Snow In Summer" plant grows through the frame of the raised bed, the spigot for the water is right there, and the hose to connect it to the hose reel is also right there. Not sure about landscaping around this spot--it's a high traffic area. |
A decent rain storm can through yesterday, just a few hours after installation. Perfect timing!!! Brendan went out during the rain to check out the progress. The barrel near the front of the house was reaching the overflow valve (!) and the barrel near the back was only about 4" deep. There was a leak from the gutter to the "elbow", so most of the water was spilling out. Brad went out later to fix that problem. (oh, and Brad wants me to point out that the barrels don't leak AND he used no caulk on them.)
The results today? Front rain barrel is FULL and the back one is about half full. So exciting! I already have plans in my head to hook up one more barrel to the front one. You can connect several together off the same downspout, which is very cool.
They're not much to look at-yet-but they will pay for themselves in short order and I'm sure we'll say, "I can't believe we didn't do this before now!"
9/9/11: I'm pleased to report that since their installation, the rainbarrels have MORE than paid for themselves.I have collected & used almost 1,000 gallons of rainwater that did not go into the sewer for treatment AND I didn't have to pay for. We've just added a 3rd rainbarrel and hope that next summer, I won't have to use the hose to water at all. I ran out of rainbarrel water & was forced to use the hose to water my garden & perennials 4 times this summer.


This post linked to Centsational Girl. Life As Mom
Love it love it love it! And your reasoning is the same as mine would be! Practical, but not Aestheticly pleasing. Whatever! So awesome!
ReplyDeleteI would really like to have rain barrels. You made it look so easy. And the best part is, you did it using stuff you already had on hand.
ReplyDeleteI would love it if you linked this post to my Saturday on the Farm linky tomorrow. :)
Linda @ Linda's Lunacy
http://www.lindaslunacy.blogspot.com
Thanks, ladies! I'm all about using what we have-and gardening on the cheap =) Linda, I'll definitely come link up tomorrow, thanks for the invite!!!!
ReplyDeleteloving the rain barrel! they are super practical and perfect for the flower beds. for christmas my hubby got me a fancy cedar covered one, does he know me or what :) Thanks for linking to Eat, Grow, Sew!
ReplyDeleteI water a lot so this is a terrific idea! Well done!
ReplyDeleteThanks so much, Olive! I actually water MORE now that I have free water at my disposal!!! Hubs has promised me at least 1 more, maybe TWO more. =)
ReplyDeleteThanks for the informative post. I found you over on Centsational Girl today.
ReplyDeleteKatie
makingittooperfect.blogspot.com
i have one that was used for fruit juice too. The smell does go away. I painted mine with primer and with house paint and it blends in with the house. Just and idea....
ReplyDeleteI must show this to my husband. I've been wanting to get a couple of our downspouts hooked up to rain barrels. Thanks for the tips.
ReplyDeleteI wanted to paint the rain barrels, but I have a good friend who painted theirs and after 1 summer, the paint started cracking and peeling. It kind of scared me off...but maybe primer & house paint might be a better way to go, rather than the spray paint meant for plastic.
ReplyDeletePink--they're soooooo easy!!!! Definitely get one hooked up--you'll want more!
First of all, love your blog, thanks for visiting mine and your kind comments. Secondly, I was just researching some rain barrel options. In fact I have a blog entry I'm working on talking about our fall project, rain barrels. I take this as a sign! ha. Seriously, though, that's something that will be virtually the first thing on my outside to do list once the inside of the house in finished. THanks!!
ReplyDelete1st Man---Rain barrels are SOOO wroth the time & investment! My new rule for rain barrels is: Always install more than you think you'll need!
ReplyDelete:)
Looking forward to more installments on your blog.